Wall sconces offer a practical way to brighten dark hallways, staircases, or underlit corners of a room, and they can also serve as task lighting in bathrooms when placed on either side of a mirror. While the idea of hardwiring a new light fixture might seem daunting, installing a wall sconce is achievable for a homeowner with intermediate DIY skills, provided the location is chosen carefully—ideally between two wall studs and above an existing outlet. The project typically takes one to two hours and costs between $50 and $150, according to a recent guide.
The key to a straightforward installation is tapping into the existing electrical circuit at a nearby outlet. Electrical code requires outlets to be spaced no more than 12 feet apart, so there is always a convenient power source within reach. By positioning the sconce directly above an outlet, you can run new wiring vertically through the wall cavity without cutting extra holes or drilling through studs. However, in older homes or those with ceilings taller than nine feet, fire-blocking—horizontal 2x4 boards placed roughly 48 inches from the floor—can obstruct the wiring path, requiring additional effort.
Choosing the Right Height and Location
Before picking up a drill, it’s important to decide where the sconce will go and at what height. The ideal mounting height varies by purpose: next to a bed, a reading light should be 48 to 60 inches from the floor; in a room for accent lighting, 60 to 72 inches; above a bathroom sink, 60 to 65 inches; and above a kitchen counter, 55 to 60 inches. These are general guidelines, and adjustments may be necessary based on the fixture’s size and direction of light.
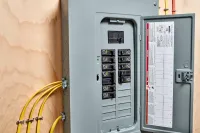
Safety is paramount when working with electricity. Always turn off the power at the service panel before starting any work. If there is any chance that water pipes are running through the walls, shut off the main water supply as well before cutting into drywall.
Tools and Materials for the Job
To complete the installation, you’ll need a manual drywall jab saw, a cordless drill, a wire ripper, a wire stripper, a non-contact voltage tester, a stud finder, fish tape, a pencil, and a tape measure. Materials include the sconce light itself, a 4-inch round old-work electrical box, 14/2 electrical wire, a light switch, an old-work switch box, and a faceplate.
Step-by-Step Installation Process
The process begins with turning off the power and marking the locations of the wall studs using a stud finder. Studs are typically spaced 14-1/2 inches apart from side to side (or 16 inches on-center). Next, mark the desired positions for the sconce and the switch, ensuring they fall between the two studs. While electrical code does not specify switch heights, they are commonly placed around 48 inches high.
Using the paper templates that come with many electrical boxes, trace and cut the holes for both the light box and the switch box. A 4-inch box requires a 4-inch hole, which can be cut with a jab saw or hole saw. After removing the drywall cutouts, assess the existing outlet box. If it’s an old-work box, it can be removed by turning the two screws counter-clockwise; if it’s a nail-in or screw-in box, it will remain in place, and you’ll need to run wiring through it using fish tape.
Once the outlet is accessible, run 14/2 wire from the light box hole down to the switch box hole, leaving 8 to 10 inches of slack at each end. For insulated exterior walls, fish tape may be necessary; uninsulated interior walls usually don’t require it. Install the round electrical box into the wall, then attach the mounting hardware that comes with the sconce kit, threading the wires through it. Connect the sconce’s wires to the 14/2 wires—black to black, white to white, and bare copper to bare copper—and secure them with wire nuts.
Next, run another length of 14/2 wire from the switch box to the outlet. For old-work boxes, drop the wire down through the hole; for nail-in boxes, use fish tape to pull it up from the outlet. Install the switch box and connect the switch: the black line wire goes to one terminal, the black load wire to the other, white wires are connected together, and the bare copper grounds are pigtailed and attached to the green screw on the switch.
Finally, connect the new wire to the outlet. If the outlet is at the end of a circuit, attach the black wire to a gold terminal, the white to a silver terminal, and join the grounds. If the outlet is in the middle of a run, it’s best to create pigtails to avoid overloading the terminals. After all connections are made, push the wires back into the outlet box, secure the outlet, and attach the faceplate.
Final Checks and Troubleshooting
Turn the circuit back on and test the sconce. If the switch seems reversed—flipped up turns the light off—you can simply turn the switch upside-down, after turning off the power again. For an even simpler installation, consider a switched sconce, which has the switch built into the fixture, eliminating the need for a wall switch. When installing old-work boxes, use a manual screwdriver rather than a drill to avoid breaking the plastic swing clamps.
With careful planning and attention to safety, adding a wall sconce is a manageable weekend project that can transform the ambiance of any room.